Sites

25 September 2018

Shadespire: 3d Terrain

I've only played one game of Shadespire. It's a good boardgame. I was also stunned by the lacked of terrain for the blocked tiles. My first thought was 'you need terrain for these pieces'.

My best mate (and the guy I've played a lot of Frostgrave with) plays a lot of Shadespire, do a lot of tournament games. So I decided to make him some 3d terrain tiles as a gift, up the game a bit. Here's a blog about what I did.

Sroll to the end for the shaowcase photos. And check out my terrain page for a lot of other scratch building projects.

The bases are from Green Stuff World, cheap and perfect size.

Pillars
I used with cheap china wedding cake pillars for Frostgrave terrain. They seemed perfect for Shadespire as well. You can find these for cheap on AliExpress and Ebay. Cut them up, glued to bases with superglue. Added some rubble from a cut up Ikea heat protector.


Filled the pillars with some tin foil. This is done to save some miliput filling in the top. 


Fill the top with miliput (I mix it 50:50 with Play-Doh to make it cheaper). Add other details from your bit box. Added some banner top skills, a spikes goblin (sculpted by Admiralty Miniatures). 


Molten Gold
For the molten gold tiles (expansion boards), I added a resin rune stone bit. Also used some half-beads in different sizes. Found these cheap online. Perfect for making bubbles in slime, molten metal and swamps.

Added a thick layer of wood glue to the base afterwards. Breaks up the flat surface and gives a liquid look.

Braizers
For the three lethal tiles I wanted to make some braziers. I used upside down 40mm round bases.


I make flames from cheap toilet paper and super glue. Rip up small pieces of toilet paper. Roll it up and glue in place with cheap super glue. Drip some super glue on top to harden it all. Repeat till the braziers are full. 


Melting pots
Using Ikea heat protectors (cheap cork board), cut out small bricks. Used small pieces of cork left overs to make burning coals.


I found some eggcups fitting the tile size. Perfect looking melting pots. I scratched them with sandpaper for the paint to better stick. Add molten gold with a thick layer of wood glue.


Using a lit candle, I bend some left over sprue into shape. Added a dwarf shield to the side and glued to the melting pots. 


Tiles
Using the cheap mix of 50:50 miliput and Play-Doh (it still hardens) I rolls out some tile work. I'm using a Green Stuff World rolling pin. The brick on this one resembles the printed graphics on the boards really well.

Let it harden and then cut up small pieces to add various places on the 3d tiles.


 Final details
Add final details to the builds. Add sand and cork rubble to places without miliput tiling. I've also added a skeleon, skulls, weapons, shields and other minor details. Paint it all up and add some flock.

 Showcase
The finished pieces using in a few games of Shadespire. I'm very pleased with the painted result, considering I didn't have the boards on hand myself.


Follow the blog
Let me know what you think here, on Facebook or Instagram. There's also a widget on the site to follow the blogger page. The blog is non-profit. It's a personal log and part of my hobby fun. But your interaction and following is highly appreciated.

24 September 2018

Terrain: TT Combat Church

I've been wanting a church for a long time. As a building it's an important part of The Walking Dead's story line and in Last Days: Zombie Apocalypse it's on of the refuge options. A church like this, will also work in games like Burrows and Badgers.

The church by TT Combat is massive, it takes up a lot of space and is really a center piece on a game table. Unlike many TTC buildings, this church comes with a bit of interior terrain.

As all MDF builds I prime the part before assembly.

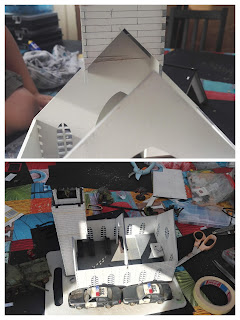
Like most MDF buildings, it's worth doing a tiny bit of work on it. First I added a raised floor from polystyrene (see showcase at the end). I wanted the preacher up higher, so everyone in the church can see him. Painted the polystyrene with some woodglue, so it didn't melt from the spray paint.


Also after assembly (so if you get a church after this, consider doing it before) I figured there was room in the tower for a small platform. Using a sharp knife, I cut off the triangular piece in the tower. This gave room for a small floor of ice cream sticks. 


It's a super easy conversion that adds much to the gaming use of the church. Now to get into the top of the tower, you can make a move half the way up first - making a two turn climb.


Painting and detaling
Not much painting done after priming the different pieces. Only the round windows on the church had to be painted black. The roof was primed black, then got dusty coats of dark grey and dark brown - it adds a bit of texture.

The entire build was varnished in army painter quick shade. I used an old cloth to soak up some, where I felt it darkened the white walls too much.

Showcase
The church makes for a great center piece on a board. Remember to check out the Modern Terrain Hub for tutorials and articles on all the homemade stuff seen here.


Maggie Greene taking up a sniper position in the church tower. My entire The Walking Dead collection is here.


Jim and Carol is getting trapped inside the church.


Carol: "Aaaaaaahhhhhh!"


Curtis standing guard on the homemade extra floor at the bottom of the tower.


A complete 3'x3' table setup with the church in the center of the board. Homemade felt mat - tutorial.


21 September 2018

Tutorial: Planters and Tree Hiders

I've been wanting to make something like this for some time. It's an easy and cheap way to add some life and color to a city board. Originally I saw something like this somewhere else on the internet, but this is my take on planters.

The planters are an excellent way of marking out a park area, front of a restaurant or a parking lot.

The tree hiders is just a quick way of bringing your forest trees into the city. Mine don't have a good base for that, but with these they'll fit right into an urban setup.

For the finished results, scroll directly to the end of the article.

Planters

Materials:
  • Foam board or polystyrene
  • Ice cream sticks
  • Wood glue
  • Basing flowers, shrub and flock
Step 1: Foam
Cut some foam or polystyrene into the shape you want for the planters. I've made mine 2" lone, 1" wide - or angled. I went with 1" lengths for them to fit into the grid on dungeon crawler maps. Could be used in a druid lair for example.


Step 2: Sticks
Use coffee stirrers or ice cream sticks. I used ice cream stick that I split in two. Cut into the right length and wood glue them to the foam board.


Step 3 - Extra glue
I added a layer of wood glue to the top. This is to prevent the super glue or spray paint from melting the foam or polystyrene. 


Step 4 - Painting
Paint the top green. I didn't paint the wood on these, but added Army Painter quick shade directly. The add flock, flowers and other basing materials.See the finished ones at the end of the article.

Tree Hiders
Using cork for this build as that material have some nice texture right away. Ikea heat protectors are cork, 10mm thick and dirt cheap. Place your tree on mdf or card. Cut a square around it with 10mm air to all sides.

Cut out some walls from the cork. Glue onto the base. Add some sand. Painting quickly with spray paint and a layer of Army Painter strong tone varnish. See the result at the end of the article.


 Showcase
Photos of the finished planters and tree hiders on some urban setups. You can check out all my urban stuff in the Modern Terrain Hub.

A beautiful small oak next to an abandoned church. My trees are homemade, here's a tutorial.


I've used the planters to mark out an area around a church, make it a friendlier (before the dead rised) place in the dirty city.


Making out a park area in the city and added some places of cover during games.


A couple of trees next to a small parking lot.


 I've used the planters and tree hiders to make out a small area in front of a small restaurant.


Homemade felt mat - tutorial.


A tree next to a small police pricint.


17 September 2018

Terrain: TT Combat Apartment Building B

I already have two modern brick houses from Laser Model Store. Wanting a few more I went with TT Combat buildings, the price of TTC buildings is only a bit higher - but they have a much larger floor area.

Before ordering these buildings, I had no idea about the interior (or missing interior). Two things to keep in mind when buying TTC apartment building A and B.

Apartment building A has no second story inside, only a floor space.

Apartment building B has a second story floor. But the inside of the ground floor, is not aligned with the doors. And there's laser cut letters in the floor.

Great value products, but a bit of work needed to make them perfect for games. See all the urban stuff in the Modern Terrain Hub.

TT Combat Apartment Building B
Prepping before a build I also paint as many pieces as possible. Using spray paint I base coat the building before assebly. White for windows and doors, mat red for outer walls and grey on the inside. It saves a lot of time over painting after assembly.

First I thought something missing on the ground floor - but it's designed this way. So I added a few steps from 4mm cork sheet inside the front doors. I also added a few layers of wood glue on the lettering in the floor, to cover it with painting.

I also decided to cover up one of the holes in the floor on the second story. The floor of the second story is not design to glue with the second story walls. Making it harder to separate them quickly during game with interior furniture. So with a few matches, I glued the floor and walls together.

After assembling the building I added inner walls, to make the buildings better for gaming. I used thick 3mm thick card board, gotten for free from a book store (it's the card books is separated by when they get them).


The second story floor had too stairwell holes in it, so I've covered one of them with thick card.


Last details
Other than the spray can base coat the painting is very limited. A bit of extra white around the windows. Then the entire building was giving a layer of Army Painter quick shade varnish. Added a few small news papers and birch tree seeds as leaves.

The graffiti was found with a google image search. Inserted into Word, printed and glued on with wood glue. Also covered with quick shade they blend in decent on the wall. Also printed a few posters.

Download: Graffiti
Download: Posters

I've written a tutorial for the homemade fire escapes here.


A couple of horror movie posters. Night of the Living Dead and Dawn of the Dead.

The house is standing on a homemade felt playing mat.


I love the Blues Brothers and Motorhead. So decided to add a few of those posters as well.


The interior terrain is cheap 1:50 scale dollhouse furniture. Full tutorial here.


The stairs to the second floor are designed and printed by the good guy behund Hedegaard Designs.


The carpets are just pieces of fabric, strengthened with some super glue around the edges, keeps them from wrinkling. Also they cover fixed floor very nicely.