Showing posts with label Mantic Games. Show all posts

1 September 2023

Big Stompy Robot

 Over on the Discord Community we run quarterly hobby challanges. The members decide us as theme to run and we all build, paint and enter something. For one of the previous challanges we rolled up random characters and had to make those. Then we used a random flag generator to come up with colors.

I rolled the following: A Mad Villain Arcanist, unarmed in heavy protection.

 Colors / symbol: Mostly White, secondary Yellow, with details in Blue and a crown.


I fairly quickly had an idea in mind for what project I wanted to do. A long time ago I bought a Big Stompy Robot for Mars Attacks by Mantic Games, I decided to to that. I wanted this made, to play with the behemoth rules for This Is Not A Test. 

I found some suitable tehnolog (russian made cheap terrain) in a box and a great mad scientist from Reichbursters by Mythic Games. 

The Bits

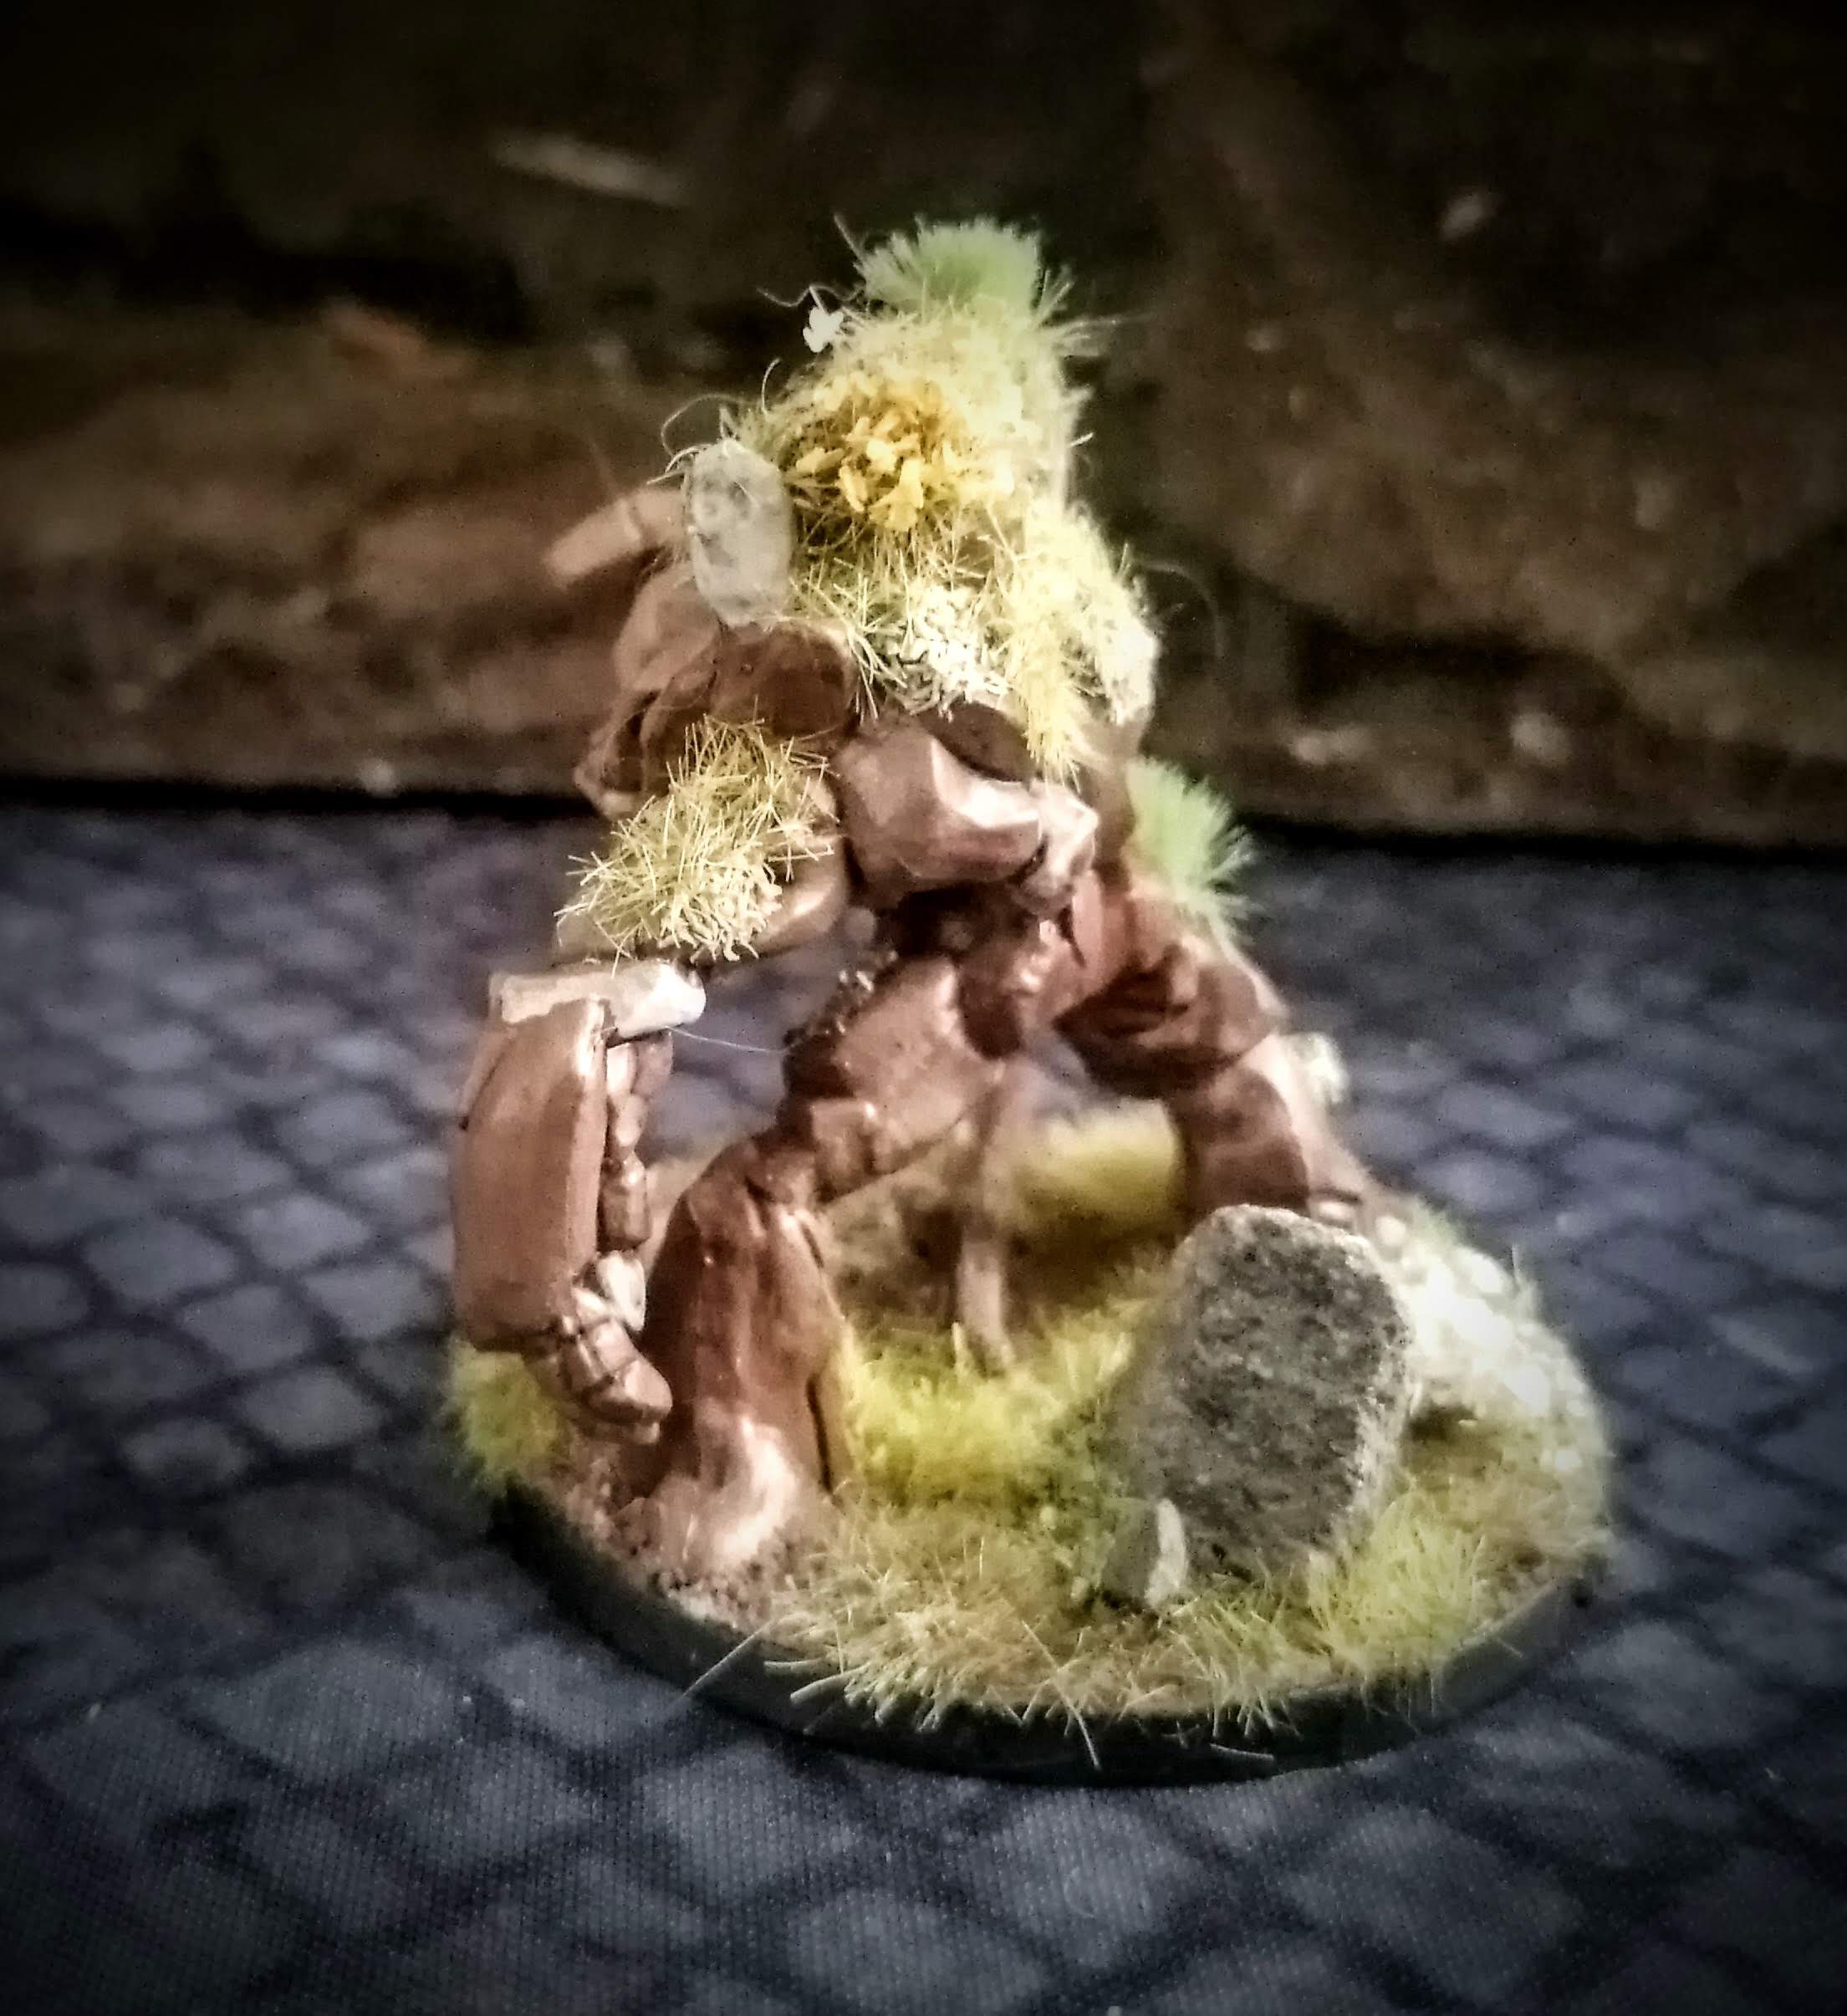
The biggest part is an old mantic martian robot. It was boringly put together, so I ripped it apart and made a better pose on legs and arms. The dome on his head is a tehnolog silo, I cut out the front. Had some random 40k building things, that I made into hydrolic hinges. Then also added some antennas and shouldpads made from a scavenged warship model kit.

I also took the heat and shrink ray arms and combined them into a single bigger gun!


Painting and basing
I basecoated the entire miniature with a gun metal color and gave it a lot of washes. Added the white and yellow from my flag on a few armor pieces. 

For the base I really wanted to go for 50s scifi stumpy robot. I made a street base with cork on a cd. Then I added a sidewalk with cardboard. Should have used a second layer of cork, as it would have raised the sidewalk better. 

I found a bit of pieces from the old Mantic Terrain Crate 2 kickstarter and added a smashed up motorcycle, a bike and a fire hydrant. 


Join the Discord

This little project was done as part of a Discord Cumminty Challange. Come join a lovely and supportive hangout community, get a microblog going and join in on future challanges. 

Join here: Discord Server. 

14 June 2023

RoSD: Spiders and Giant Rats

 So for a recent replay of RoSD "The Missing" I needed more giant rats and spiders. We were playing four guys over Discord / Twitch and the upgraded multiplayer rules calls for more monsters. 

I went into the bit box and picked out all the giant rats I had in it. There's rats from Skaven kits, Terrain Crate and the old Warhammer Quest.

So I grouped them up on bases, to make something closer to swarms - or at least with two rats on one base. It's a trick I've seen don by others, but it really adds a lot. 

These spiders I've had lying around for a long time. I wanted to use these spiders for addign extra to the bigger ones I already have. So will be adding these to the bases of Wargames Atlantic spiders for example. 

Being small toys, they're still decent. Quick base coat, some bright spot color and static grass as hair. It's the quickest and nastiest way to gross up a spider - add static grass hair to it. With these, I'm pretty much set for spiders and rat for all manner of skirmish games.

Then again, these critters are in all the fantasy games out there.


Have a look around the blog, there's a lot of different stuff. Also consider checking out the Discord Community, there's so many nice and creative people over there. Here's a link

17 February 2023

Fantasy - Elementals

 I love elementals and always have. It is a perfect and classic fantasy monsters. Having backed all manner of kickstarters over the years, I also have a lot of different elemental miniatures. So here's a collection of some of them, big ones. All these are from the Blacklist Miniatures Fantasy Series 1 KS. 


Most of the Blacklist elementals are made in transluscent plastic, which makes for some quick paint work on them. A layers of matt varnish first, so a wash will stick to it. 

The fire elemental had some sepia wash and red wash. Then I drybrushed it (very lightly) with black. The based is made with dead grass and then it's painted black closest to the elemental, to give the look of burned grass. The eyes were picked out with yellow. 


The shambling mound / swamp elemental. Base coated green, drybrushed different lighter greens. Then I used some basing materials to add 'living' plants on it. The based is given a lot of life with tufts. I used an old broom to make the reed. 


The little dude fits well with the shambling mound. The living little tree is from Dreadball Extreme from Mantic Games. Base coated brown, drybrushed different browns and had flock added to the back. 


The ice elemental is cast in clear blue resing and is a limited edition thing from Kings of War: Vanguard kickstarter. I backed it mostly for the miniatures, sold off a bunch of it and ended with free miniatures. I matt varnished it and gave it glue wash. Then I added snow flock to his back. 

The small ice golem is from an old Mantic game - some elemental chess that I've forgotten the name of. The miniatures were dirt cheap. He's base coated dark blue and drubrushed light blue to white. 

Both are perfect for Frostgrave.


The water elemental is simple washed with a blue, then it's been drybrushed lightly with white (hard to see in photos from shine) on the back, so it looks a bit like foam on him. 


There's a lot of great earth elementals out there, I don't think this is a very good one. I painted him in different browns and some chunks to loke as stones. Then I added a lot of flock and tufts to him, like he's just been pulled from the ground. That saves the miniature and gives it some much needed detail.


It's pretty tough to paint air. ... The miniature is pretty well done though. I picked out the eyes and then gave the entire thing a sepia wash. It works quite well and it brings out the swirlyness of the sculpt. 


If you enjoy all manner of miniature blogging, follow some of the social media. I try to use all of them differently. You can find them on linktree. Also considere giving a look on Guilders: A Life In Shadows, a skirmish campaign game I'm working on. 


9 January 2023

Terrain: TTC Houses

 More TTCombat mdf houses for the Fantasy City board, used for Guilders: A Life In Shadows

So far I've build an entire 3'x3' board worth of buildings. These are more of the super cheap "25mm" WW2 house from TTC. The size fits well for both 28mm and 32mm miniatures. 

For a full ste-by-step tutorial on how I upgrade these houses to something nicer, you can check out this previous blog post

I also talk about the upgrades and show the buildings in this video: 


The Swedish House
I try to mix up the colors for all my buildings, so I have as many different combinations of colors as possible. All houses colors are also some I've found doing research online. Another way to change them up, is I've placed chimneys differently and the board ledges as well.


The furnace is from Terrain Crate by Mantic Games. It was a quick little piece to do, but adds some nice life to the city board. Will fit equally will in a dungeon. 

Shop
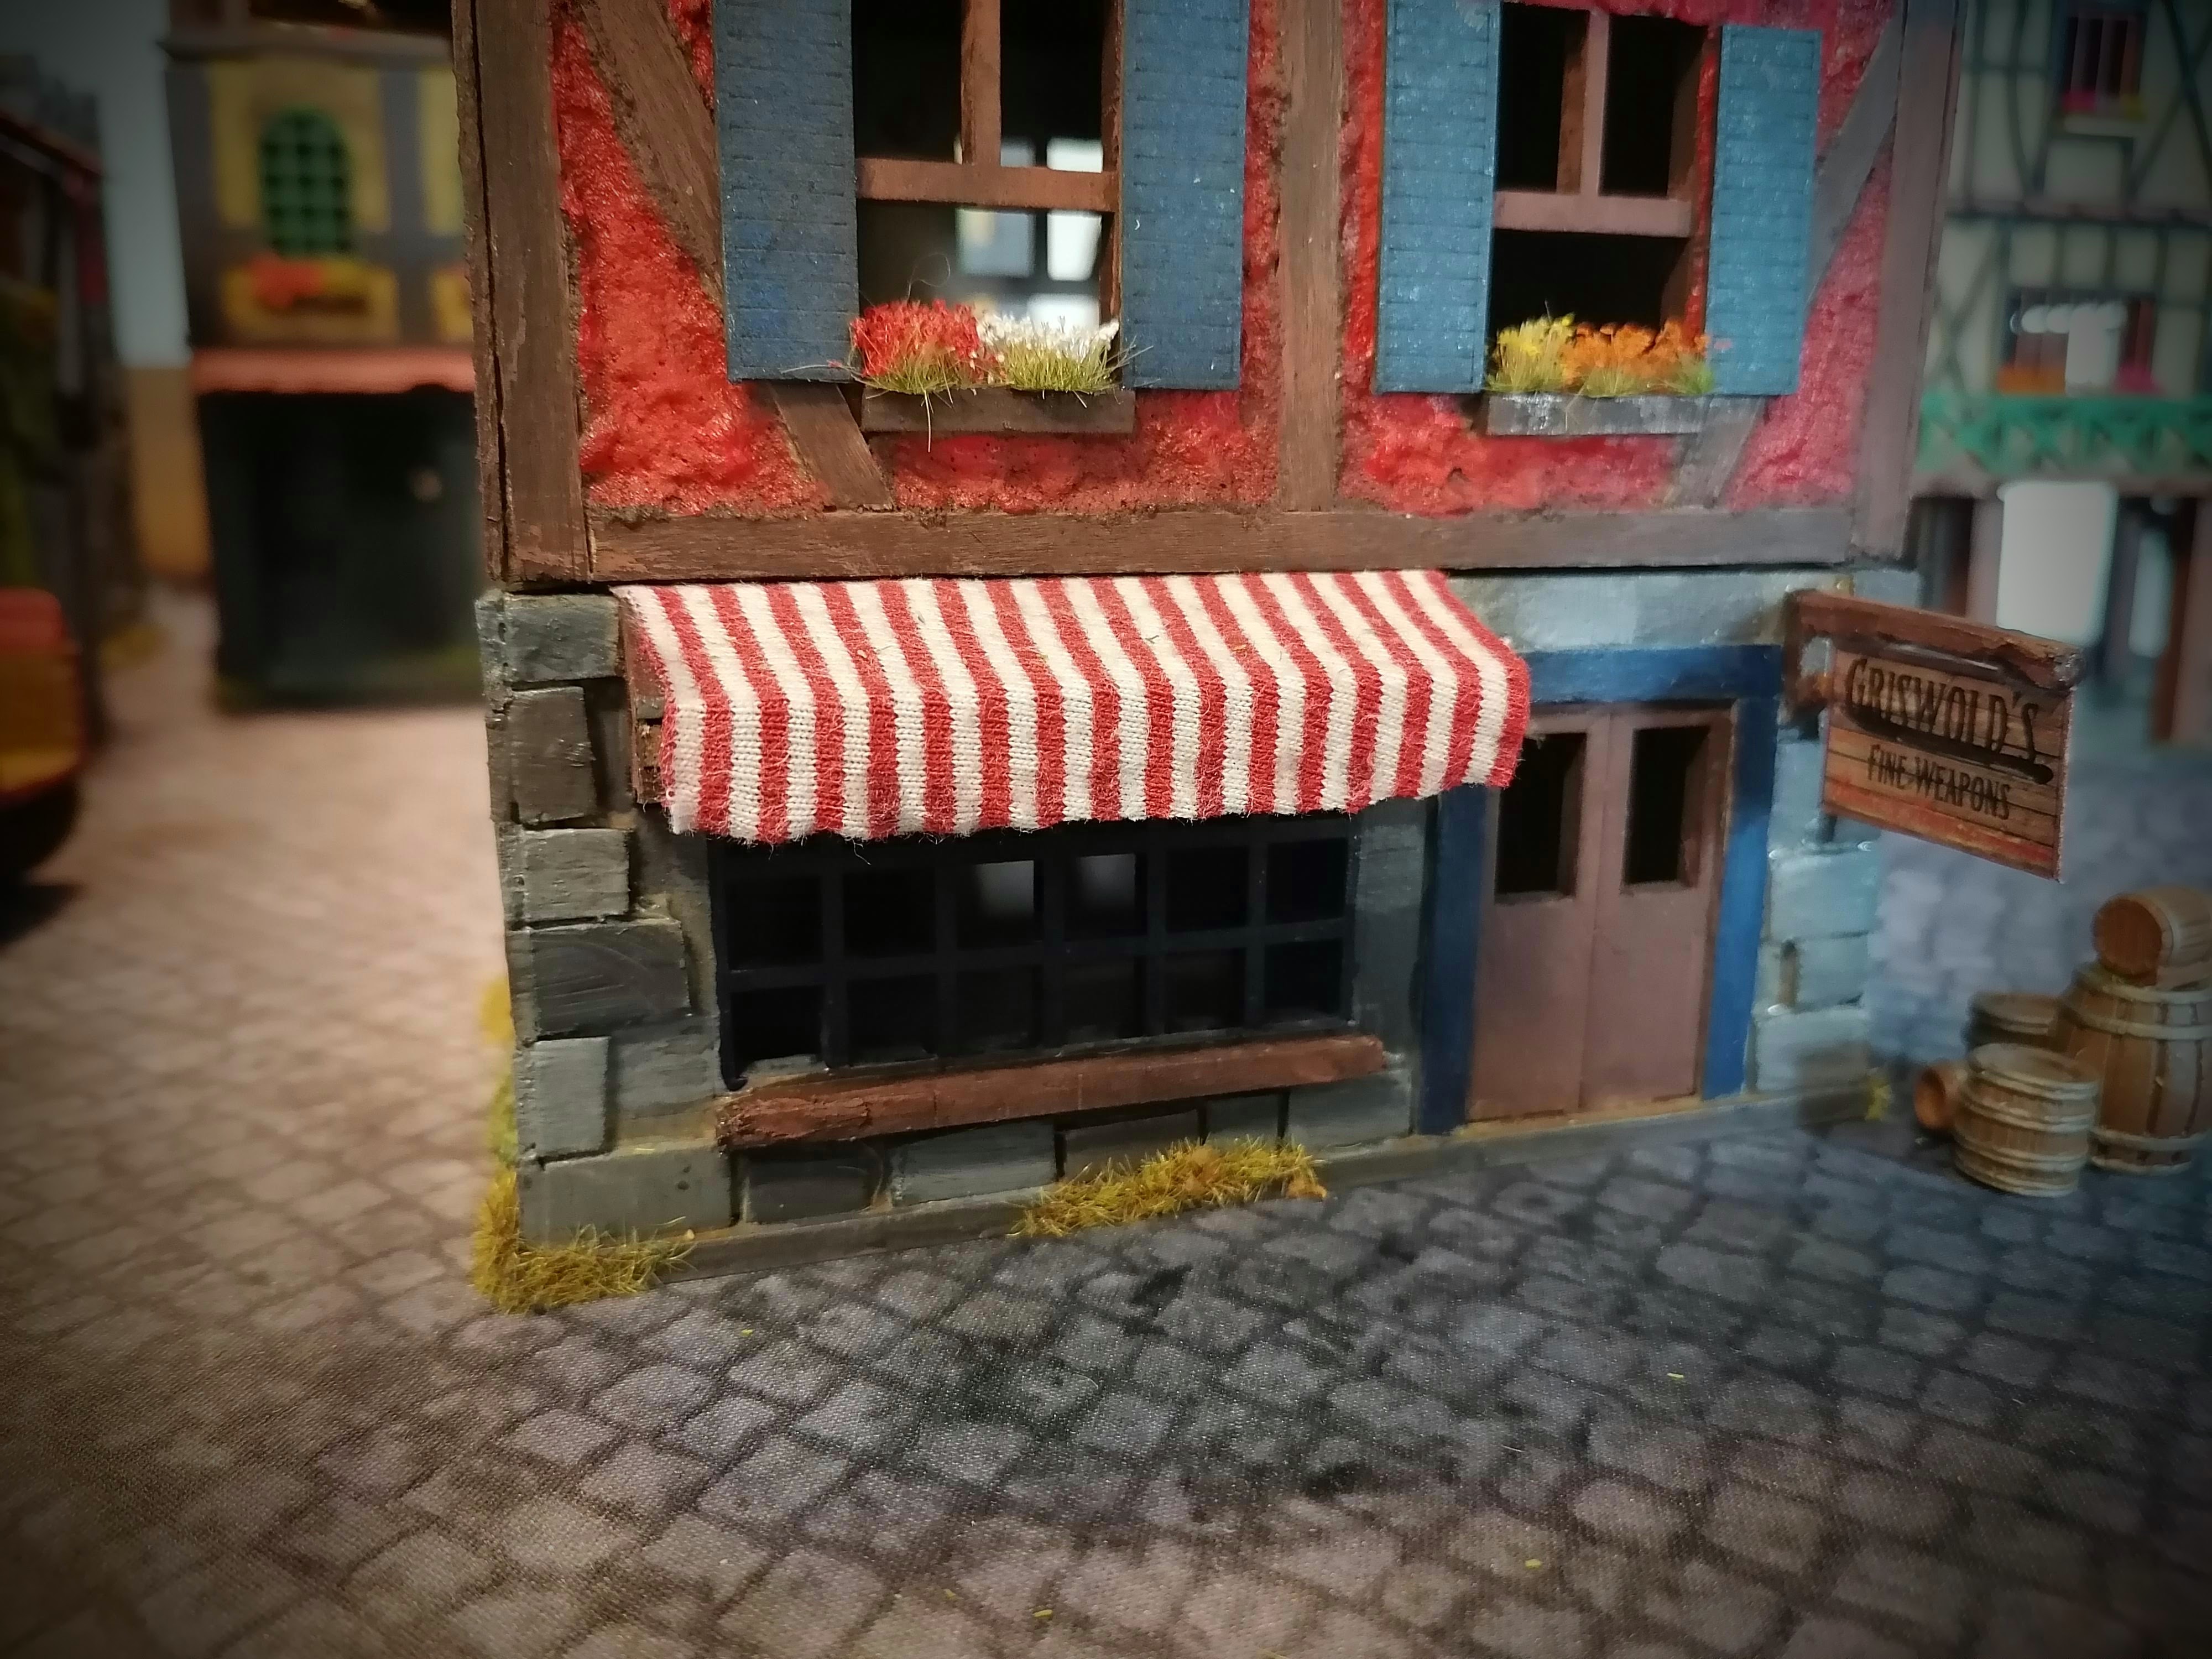
The other little building is a shop. I found some checkered fabric pieces and just for awnings. The buildings come with grey board, but a quick upgrade to real fabric does so much for the life of the building. I've used the online Coat of Arms maker, to make some signs for the buildings - that I'll get around to adding at some point... in some future. 


Whenever I build some terrain I make sure to cover the build process with a blog post and step-by-step guide. So follow the different SoMe platforms, if you want to make sure to catch them. 


31 October 2022

Terrain: Two Fantasy Houses - TTCombat

 Back when I started writing Guilders: A Life In Shadows I needed a fantasy city quickly. And I've been wanting one for many years. So I bought a bunch of cheap TTCombat kits. Might even have been bougth at some Black Friday deal to get it extra cheap. 

TTC have a line of super cheap small 25mm WWII building. The doors don't really look 25mm - but that's hobby scaling for you. 

Video: I Did a small video talking about these buildings and what I've done to them. 

Building: I've covered the complete upgrade from WWII to tudor style fantasy house before. So for the step-by-step you can check out this blog post. Same techniques used in this one. 

Set: Village Bakery

The first kit is the 25mm village bakery. I've made mine into a smithy instead. Instead of the greyboard awning, I added some actual fabric for a more realitic look. I found the Griswold smithy sign somewhere online. Tweaked the colors a bit in google photos. Printed and glued to cardboard. It's simply superglued to the bbq stick I added to the house. 


As with all my buildings I want to have as much of color as possible. I also look at the different buildings, so to mix up roof color, plaster and timber frame colors. The storm shutters and doors etc. I want it different across the entire city. 


The forge is not glued to the building. It's a Mantic Games terrain crate bit, can be moved around. It fits nicely against the wall. 


As always I've added walkways around some of the roof, for better thief acrobatic actions. 


Also posters are always added here and there. This time they're all from first Dunkeldorf kickstarter.

Maison Belle
The second house is another Maison Belle house, also from the TTC 25mm WWII range. By mistake I ordered two of these houses. So I made sure the change the timberframe a bit, use different colors and put the walkway at a different height. 


There's walkways on both sides of the house.


If you check out this shot, you can see how 25mm seems a bit of. The Fireforge peasent is 28mm (on the larger, heroic scale end) and he has plenty of room not to bump his head on the door. 


Each time I do one of these house I get better at detailing the walls. The thick cardboard rocks, the cross beam. All details that break up the flat MDF surface nicely. 


All buildings in my city have a 8mm-1cm wide flat top, so miniatures can walk across the roof top. 


A quick side by side shot of the two Maison belle houses. It's before the new one was finished. But it shows the massive diffence in detailing from my pre-paint work. Coffee stirrers instead of icecream sticks. Stones added at the foundation and painted bricks on flat areas. 


Thanks for reading people. 

As always make sure to follow some different SoMe. I use all the platforms differently. And if you like a great forumstyled community, come check out the Discord. Best hobby people around are in there. It's a very nice place. 

It's all on LinkTree.