Showing posts with label Tutorial / Step-by-step. Show all posts

6 April 2024

Terrain: Peacock Inn - interior

 For the game Guilders: A Life In Shadows there's a few scenarios, that require play inside buildings. I've covered the build of this huge tavern, based on a TTCombat Carnevale set before in this blog. And covering some of the bits and bobs painted for the interior in this blog

Now the entire thing is completed. Take a small trip through the build in this little video and read on for some words on how it's done. Most of the miniatures in there are from Dunkeldorf.


I 3d printed some flat doors found on thingiverse. Some of the prints failed, but since I don't like throwing suff out, it was easily fixed with some coffee stirrers. 


I've printed out some floor details, found online somewhere. I printed them on a3 paper, so they fit an entire floor with having to make some funky line-ups. 


I also found a bunch of pictures of carpets online, printed them out and glued them in place here and there. 


For the stairs, I printed some I also found online, and to save space on the top floor I simply added a wooden trapdoor in the floor, that saved me from cutting actual holes in the terrain - that would serve no practical purpose anyway. 


The walls are painted an off white that I mixed with cheap acryllics. It's painted on with a sponge, it adds a bit of a textured detail with the MDF shining through here and there. 


I added rooms to the floors using thick cardboard. The doors don't open, but that's not really a problem during gameplay. The wooden beans are used coffee stirrers glued in place, but they really break up that MDF look nicely.


Normally I've been opposed to gluing terrain in place inside buildings, not wanting to 'waste' painted interior. But these days, I glue terrain inside. It's just easier and with 3d printing and a ton of terrain crate - I'll never run out anyways. 


The top floor is a large suite, added some nicer looking interior details up here. Some a Dunkeldorf bits, some are from Mantic games. 


Full topdown look on the 1st floor, with two small common room and one room that's a bit more exclusive. 


This is the top floor suite, with one large room and a seperate sleeping chamber. 


If you like my stuff, please consider following some of the SoMe pages, it'll all help once Guilders is released and goign into sale. You can also pop into the Discord, it's a very good little community of supportive hobby people. It's all found through my LinkTree

31 October 2022

Terrain: Two Fantasy Houses - TTCombat

 Back when I started writing Guilders: A Life In Shadows I needed a fantasy city quickly. And I've been wanting one for many years. So I bought a bunch of cheap TTCombat kits. Might even have been bougth at some Black Friday deal to get it extra cheap. 

TTC have a line of super cheap small 25mm WWII building. The doors don't really look 25mm - but that's hobby scaling for you. 

Video: I Did a small video talking about these buildings and what I've done to them. 

Building: I've covered the complete upgrade from WWII to tudor style fantasy house before. So for the step-by-step you can check out this blog post. Same techniques used in this one. 

Set: Village Bakery

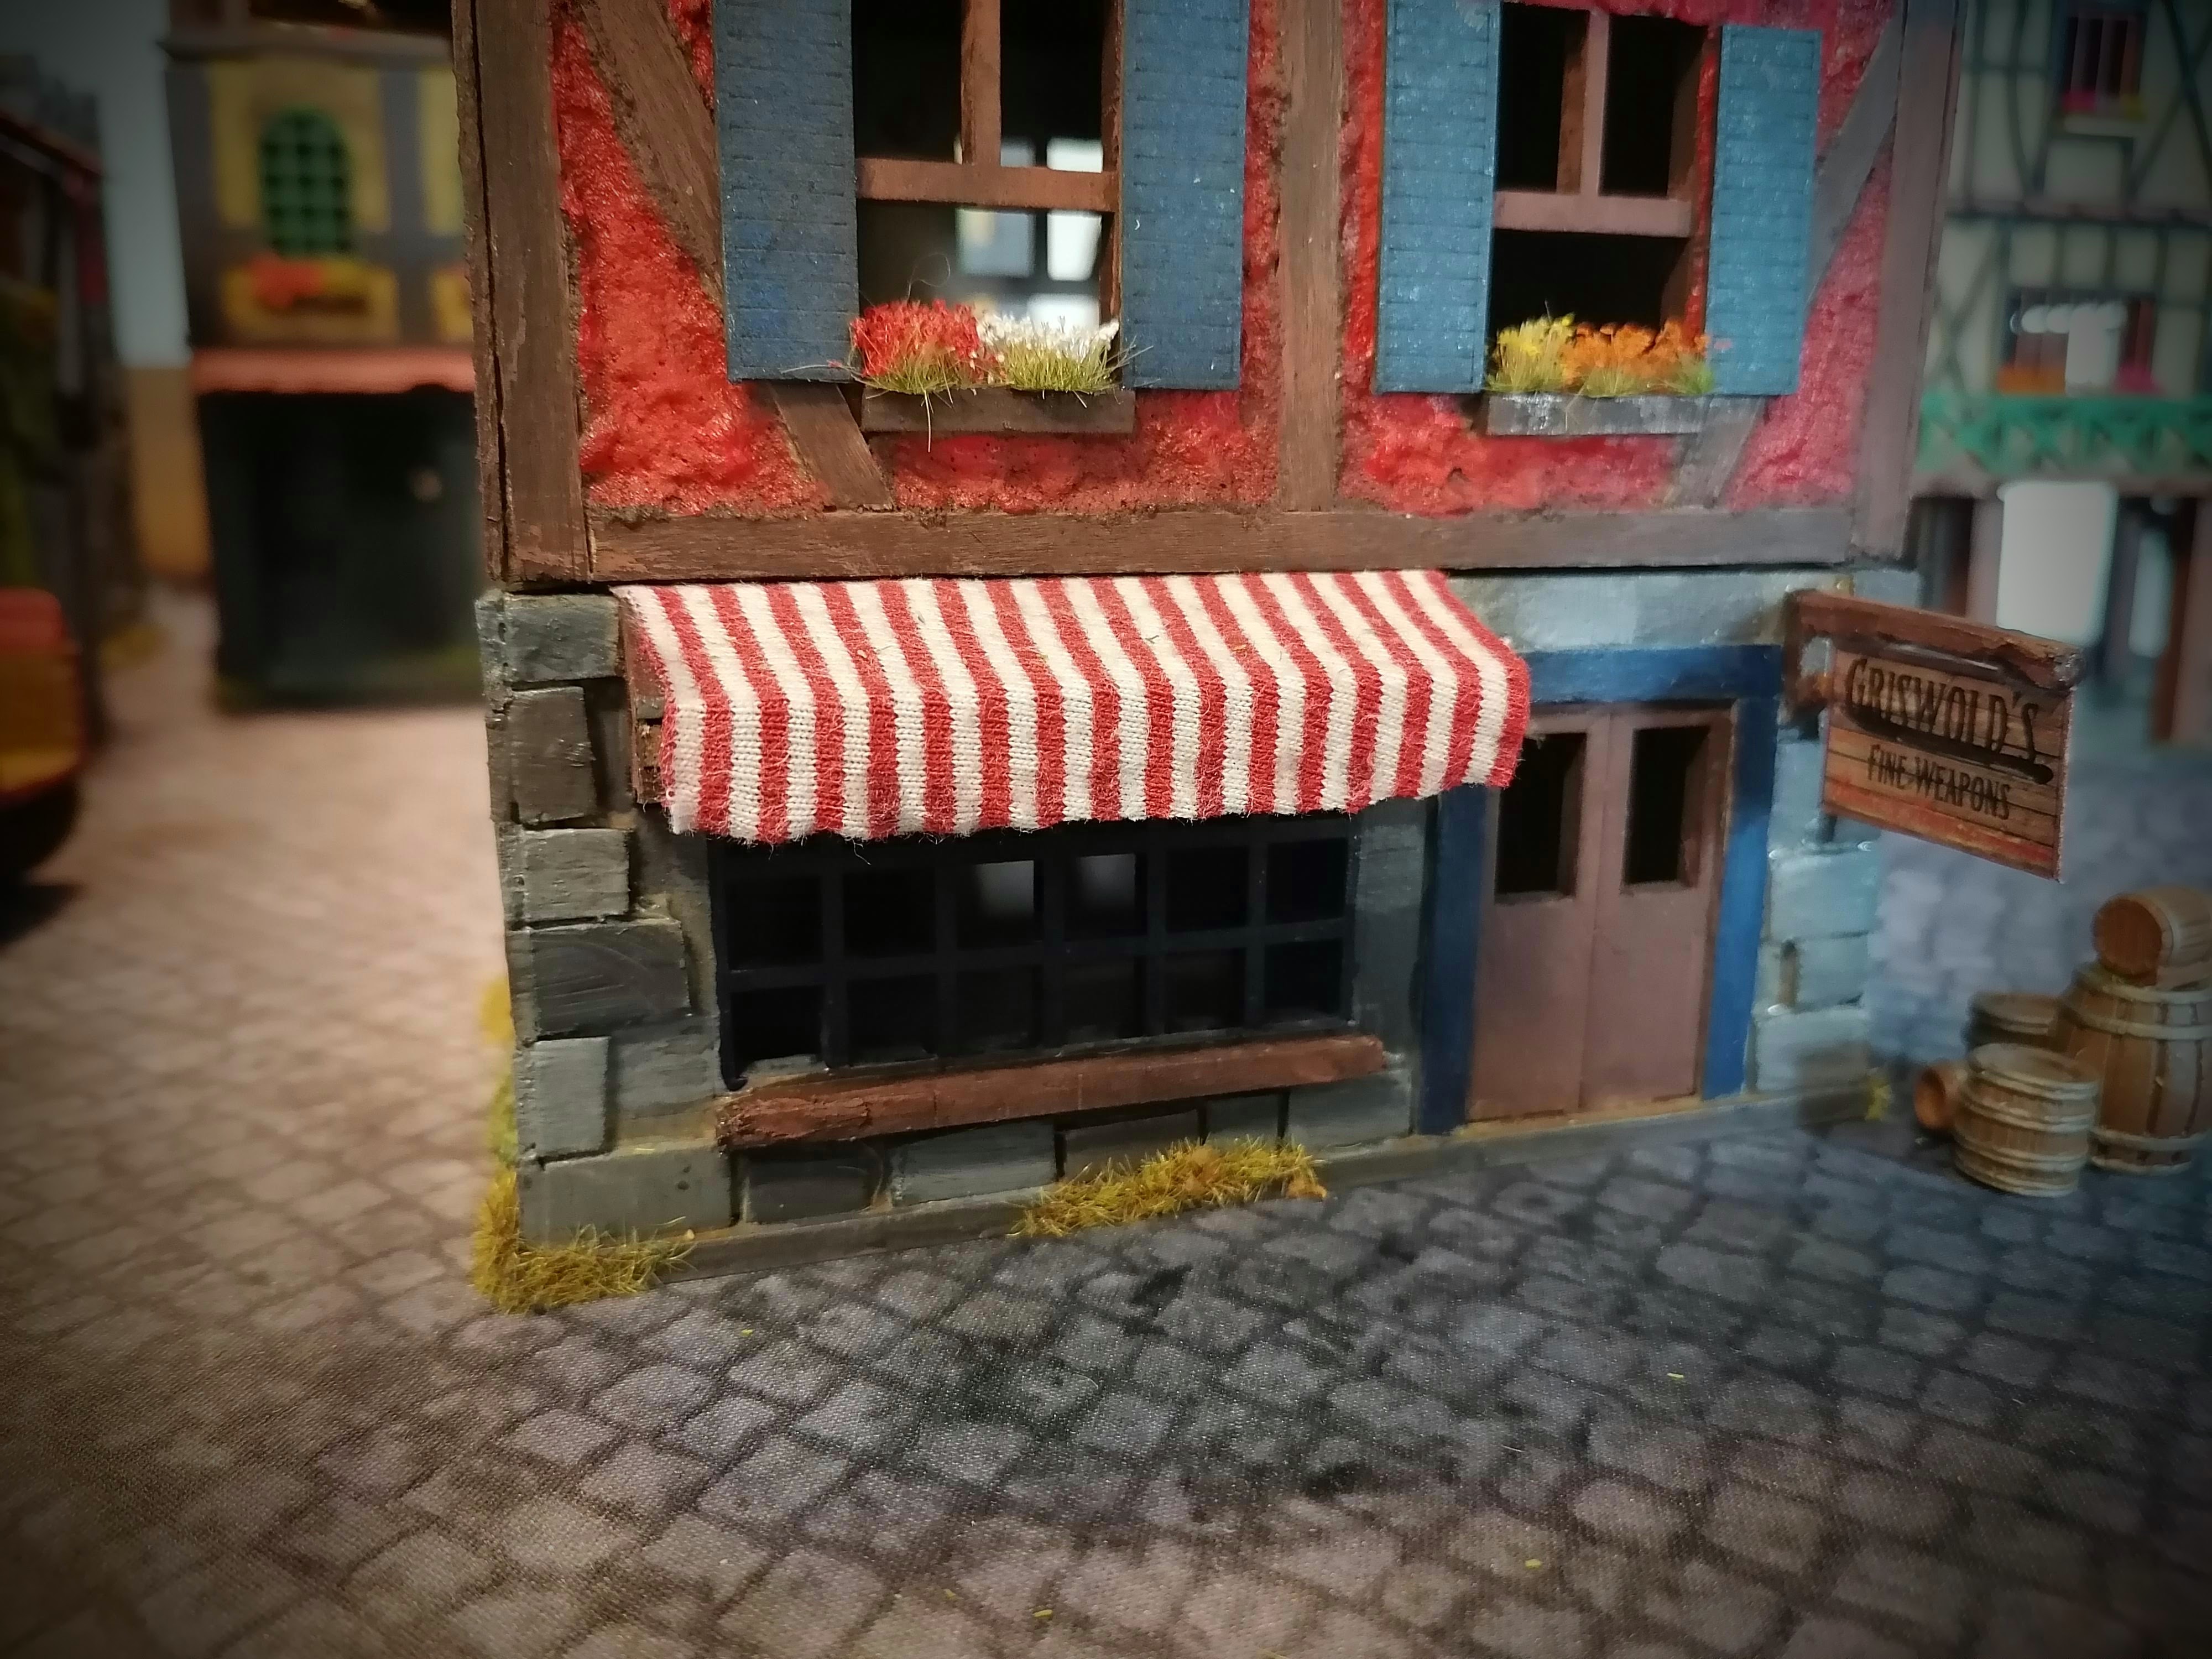
The first kit is the 25mm village bakery. I've made mine into a smithy instead. Instead of the greyboard awning, I added some actual fabric for a more realitic look. I found the Griswold smithy sign somewhere online. Tweaked the colors a bit in google photos. Printed and glued to cardboard. It's simply superglued to the bbq stick I added to the house. 


As with all my buildings I want to have as much of color as possible. I also look at the different buildings, so to mix up roof color, plaster and timber frame colors. The storm shutters and doors etc. I want it different across the entire city. 


The forge is not glued to the building. It's a Mantic Games terrain crate bit, can be moved around. It fits nicely against the wall. 


As always I've added walkways around some of the roof, for better thief acrobatic actions. 


Also posters are always added here and there. This time they're all from first Dunkeldorf kickstarter.

Maison Belle
The second house is another Maison Belle house, also from the TTC 25mm WWII range. By mistake I ordered two of these houses. So I made sure the change the timberframe a bit, use different colors and put the walkway at a different height. 


There's walkways on both sides of the house.


If you check out this shot, you can see how 25mm seems a bit of. The Fireforge peasent is 28mm (on the larger, heroic scale end) and he has plenty of room not to bump his head on the door. 


Each time I do one of these house I get better at detailing the walls. The thick cardboard rocks, the cross beam. All details that break up the flat MDF surface nicely. 


All buildings in my city have a 8mm-1cm wide flat top, so miniatures can walk across the roof top. 


A quick side by side shot of the two Maison belle houses. It's before the new one was finished. But it shows the massive diffence in detailing from my pre-paint work. Coffee stirrers instead of icecream sticks. Stones added at the foundation and painted bricks on flat areas. 


Thanks for reading people. 

As always make sure to follow some different SoMe. I use all the platforms differently. And if you like a great forumstyled community, come check out the Discord. Best hobby people around are in there. It's a very nice place. 

It's all on LinkTree.


5 October 2022

Terrain: Barracks


This blog post was originally written as a feature for Uncle Vanyas, an excellent little compendium made for Zona Alfa. If you want to check out a really cool community, head over to Stalker7, Patrick Todoroffs play ground.
----

"Alright kids gather around and listen to old Uncle Vanya. I got another tip for you, a good place to look when you're inside the Zone. The the anomalies started and everything went to shit, all manner of forces moved in here to control and contain it. Both the army and those bloody UN peacekeeping tourists. The all set up FOBs - before knowing what was going on!

Now you can find these FOBs all over the Zone, huge areas filled with those nissen huts, prefab steel barracks - we call the tin coffins around here. The thing is, they're often filled with good stuff. The Zone is filled with them! Sometimes soldier boys leave those FOBs as part of a mission, just leave - might come back and use them later. Cheap to build, so just leave 'em. Might forget or leave common stuff. Sometimes they have to evacuate quickly as anomalies shift or they just all die from some weird stuff.

That's the tin coffins you really wanna find, a base left in a hurry. Just keep your fucking eyes open! You might find NVGs, MREs, boxes of Igolnik rounds - or some weird deadly shit. Had a guy try to light a campfire with scavenged fuel, it turned out the jerry can was filled with Hellslime - blyat, what a mess.

Where to look? Well there's manned bases around the edge and near the checkpoints, but you can find the abandoned ones deep in the Zone. Sure I know a few tin coffin graveyards. Here give me your map, I'll mark out a few."


Let's build some super cheap, scrap material terrain - the well known corrugated steel barracks.

Materials: Oversized tin cans, thick card / mdf, duct tape, masking tape, sand, wood glue, spray paint, cheap acryllics
Tools: Metal shears / grinder, hot glue gun (optional), knife, cheap brushes.


Step 1 - Cutting the can
Get your oversized tin cans. These are the ones they use at the pizza place, deli or restaurants. I found my first in dumpsters at the store and then got some from my pizza guy. Mark them in half and cut them with metal shears (it's a bit tricky at the bottom). You can also use a grinder, it's faster but it's a two man job.


The tin cans will bend when doing this (either way), but it's easy enough to fix, so don't be alarmed when they're out of shape.


Step 2 - Making a base
Time to make some bases. Not much to it. Use mdf, cardboard or whatever else you have lying around. I found some discarded board in my school's arts and craft room.

Make an X on the back of the base with duct tape. Do this on all your terrain, always. The X will add some tension to the base and it prevents a lot of the warping you often get from using wood / pva glue on bases. All my homemade terrain has this X underneath.


Use a sharp knife to angle the base edge, we don't want that steep 3mm edge. Angle it out, nevermind it not being completely even.
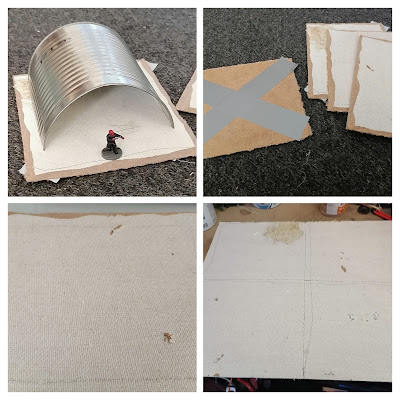

Step 3: Gluing it down

Place the half can on the base and draw around it with a pencil. I used a hot glue gun for mine. Contact glue will work as well or PVA (though this is not the best option). If using pva, use a lot, at pressure on the barracks and let it dry completely.


Sand up the edge of the base. Use this time to strengthen the bind, I added lots of glue and sand on the edge of the barracks (inside and out) - to keep it in place. Perhaps add more than one layer. My hard board had some nice texture, using that as concrete in this build.
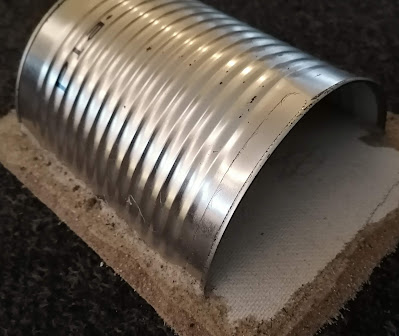


Part 4: Painting made easy

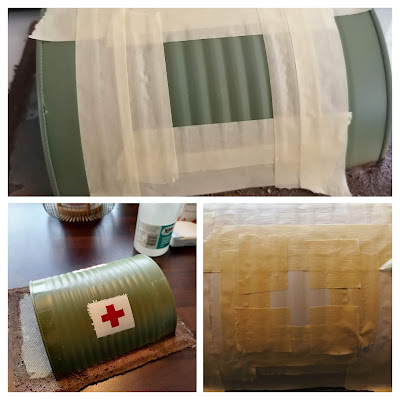
All my terrain is nearly completed with cheap spray paint. Saves time and is damn quick. Paint the inside and floor grey first. Then use paper to mask the floor and paint the barracks green. Then mask with paper and paint the sand brown. Five minutes and you terrain looks decent.


I wanted one to be a medical bay, so using masking tape I made a square - spray white. Then using smaller pieces of masking tape made out a cross - spray red. Make sure previous layers is completely dry before adding masking tape.


Step 5: It's all in the details
Repair the outline of any stencil with a finer brush and hobby paints. I've also added some details to the barracks with chess piece markings, painted free hand. In Escape from Tarkov the military base buildings have call signs based on chess pieces - making for easy identification. Fun little detail.
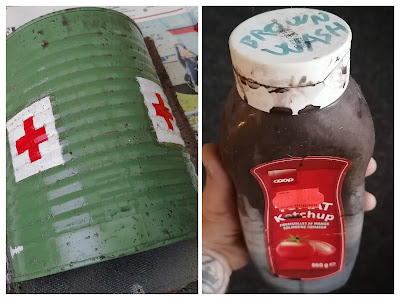


We need to blend and tone this spray paint layer. I use a homemade brown wash for all my terrain. Cheap brown and black acryllics, dishwash soap (a few drops), water and PVA. Splash the entire thing in it, a few layers. Flick that paint brush as well for some stains.


Lastly add whatever static grass and tufts you want to the base.

Showcase
All finished up! Here's some quick to build, super cheap terrain pieces that'll fill out a lot of space on your board. This build is easy to make for other settings as well. I plan on making both a couple of all white red cross ones and some yellow / blue FEMA ones.


If you enjoyed this, please check out my blog: Bloodbeard's Garage for more cheap scrap material builds.


Let's see a couple of stalkers getting into trouble at an abandoned army FOB.


4 April 2022

Guilders: Crowd Bases and cobblestone

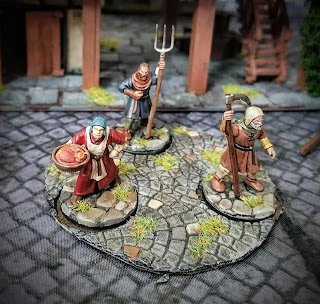
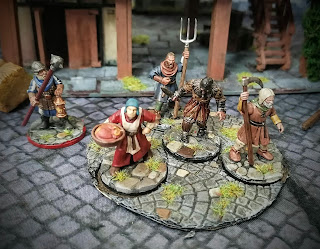
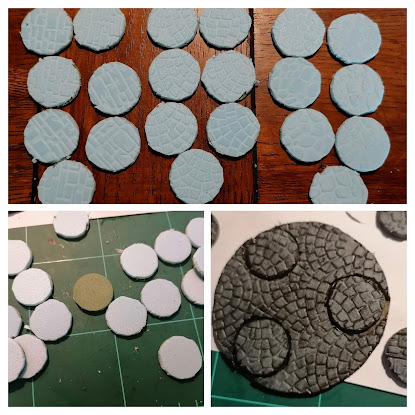
 Here's a tutorial style post on how I made my crowd bases for Guilders. In the game the crowds are represented by a 3" round base. There's no rules as to how many miniatures should go on it, but I've made room for three.
When painting these I've drybrushed some different greys, picked out a few individual stones on each base and then added small bits of static grass.


Here's a guard totally unable to find that hiding thief! 


Materials
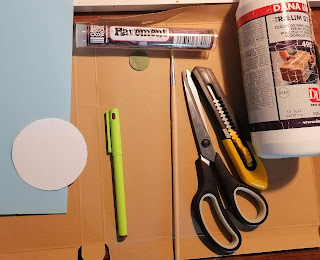
Cardboard, XPS foam (1 or 2mm), paper, Green Stuff World pinroll and pva / wood glue. 


Step 1
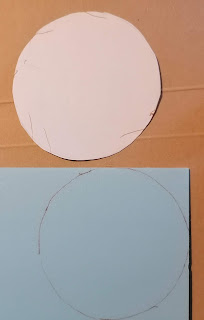
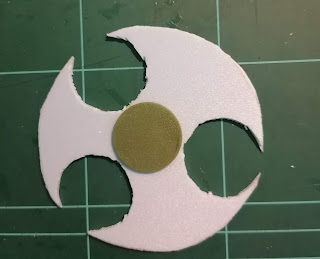
Cut a 3" round circle and draw it onto the XPS foam.  Cut those out with some scissors. 


Step 2
For stability, I want to make inserts for the miniature bases. They're all based on 25mm bases, so draw three on it's large 3" base.


Step 3
Cut out those 25mm inserts with a fresh hobby knife, needs to be really sharp. This leaves room in the middle of the crowd base for another miniature, if a player character enters and hides in the base.


Step 4
Glue. Lots of glue on the 3" bases, but on some thin cardboard and put pressure on it while drying. I placed a ton of books on top, we don't want them to warp too badly. 

 
Bonus Step
Mess up some 25mm round bases with a knife (for better grip) and glue all those 1" discs to them. We don't want any waste! 


Step 5
Time to bring out the Green Stuff World roller. It'll keep the presured texture made in the XPS foam. 

 
Step 6
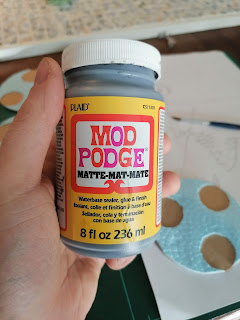
Mod Podge is amazing! It's some kind of varnish / glue thing. I've mixed some black into mine, so that it now dries a very dark grey. This will seal and harden the foam very well. I can't recommend this stuff enough for anyone working with foam. 


After a nights work I have a bunch of finished crowd bases and a lot of 25mm bases for future miniatures.


20 February 2022

Terrain: Village Maison Belle and Youtube Video

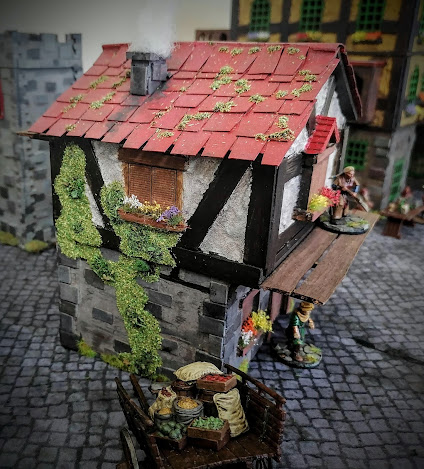
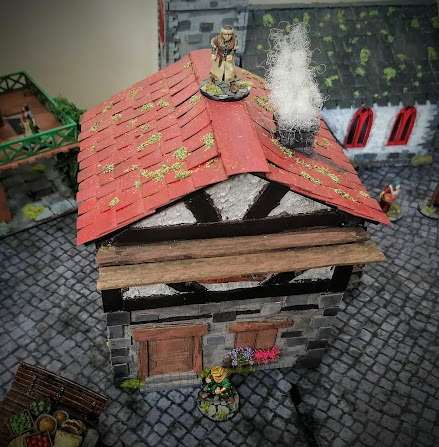
 Slow and steady work continues on my dream fantasy city for mainly Guilders: A Life In Shadows. This is one of the smaller and cheaper kits from TTCombat, 25mm world war 2 buildings. They do upgrade really great to fantasy buildings though. 

There's photos of the completed build and a YouTube video below, but first som WIP shots. 

The Build

Roof and Timberframe

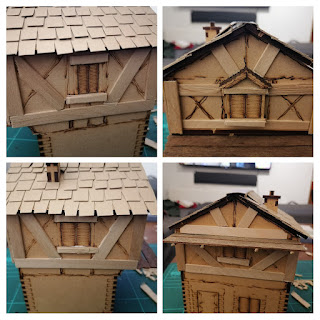
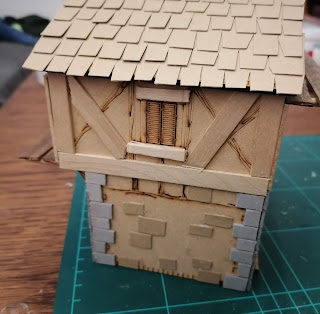
The kit is simple and quickly build. It has some decent burned detail timberframe, but I'll cover that with plaster. 

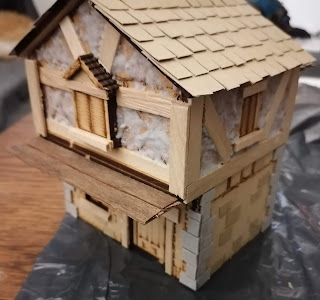
The first thigns done is simple timberframing with coffee stirrers and popsickle sticks. The roof is made from strips of cardbaord with small cuts. Never do individual roof tiles, it's a stupid amount of work. But these strips are very quick to could and stronger when glue in place. 

The top part of the roof is made with a broad piece of cardbaord, as I want a 1cm flat surface on the top. This was fixed in place with a bit of greenstuff. Great addition, as it'll allow chracters to stand on the roof. 

Stonework, walkways and plaster
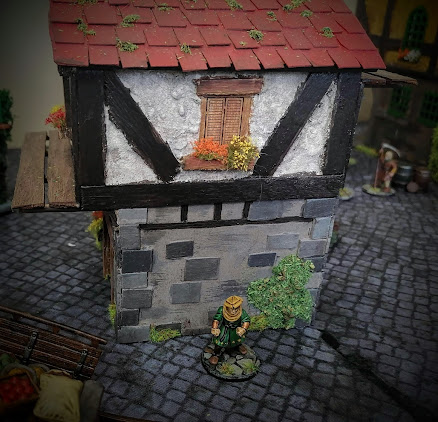
I' want ground floors in stone on all my buildings. For this I've used two diffent thickness of cardboard. On the corners of the building I've used the thickest made sure there was 0,5mm space between them, for a better drybrush and wash effect. 

Then added a few stones here and there on the walls.


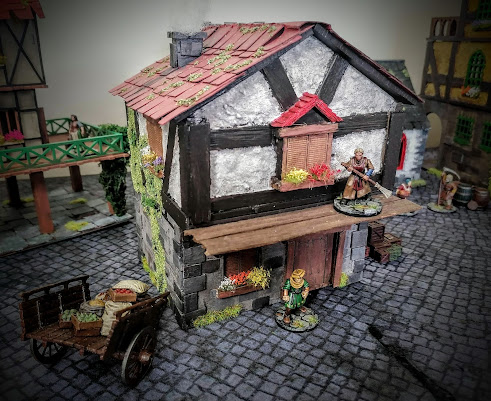
Added some walk ways on both sides of the building, again for better skirmish game playability. Drilled holes through the house and added some beams from bbq skewers. On this I added some thin mahogany boards, scavanged from the local hardware store. Could have used some coffeee stirrers as well. 

The plaster is pre-mixed wood filler with added wood glue for extra strength. Just add it with an old brush you don't mind dying.

Painted up
A lot of the work is done with spray paint. Grey on the ground floor, red on roof, with on first floor. Everything else is then painted with cheap acryllic paints. For the stones I mix as I go to get different tones on the build. 

The entire build is washed in homemade brown wash - thinned cheap brown and dish soap. On the white parts I paint on wash then soak up most of it with a piece of cloth. The plaster makes it's easy to do a drybrush on the building, getting a better color on the build. 

I've made ivy with some old saw dust flock and added a ton of Army Painter flowers to the different windows. Smoke for the chimney is made with teddy bear stuffing glued down with super glue.


A Youtube Video

Had a small chance of making a few video clips. So I setup some cameras in order to make some material. Did a quick video where I show off the above building and my Peacock Inn

Tried some new stuff in the video as well, working a bit with video software. Adding a bit of background music. 


Linktree
I've setup a Linktree, a quick way to collect all the social media links together. Check it out and drop some support on the various places.