11 April 2017

The Walking Dead: Walkers Wave 1

The Walkers were a joy to paint, really easy to do. I went with a 'Necrotic Flesh' basecoat from Army Painter. The Kickstarter box came with a bit of dublicate models, so I've tried to go for very different colours on those miniatures. Also gave some of the dublicates some hot water treatment, to try and change the pose on their arms. Minimum work in order to make the different.

Unlike my Wave 1 Survivors, I've put blood splatter on most of the Walker bases. All blood is done with Games Workshops 'Blood for the Blood God' effect paint. It looks a lot better in real life.

All these Walkers were photographed before I build my light box.


Painted up the Ronnie Renton walker in a Mantic shirt. The guy on the left is based on a good friend of mine, he has the same cap and leather vest. 


In most of my game systems I try to make at least one 'The Watchmen' smiley. The iconic badge worn by the Comedian with a bit of blood over the one eye. Walker Reggie and Waler Shane are both painted in the same colours as their Survivor counter parts.


 The police officer walker is rocking the same uniform colours as both Rick Grimes and Shane.


A shot of some walkers with details on their backs. 
 

The Herd size Wave 1. Thirty two bloody shambling corpses.


8 April 2017

The Walking Dead: Survivors Wave 1


The complete collection of wave 1 survivors from the Kickstarter Edition of the game, as well as the retail exclusives. The photos were taken before I got my light box setup and that shows.

The Grimes
Colours on the Grimes are based on a comic cover, except Rick. Rick I've painted in the same colours as I've used on my Law model in Devils Run.


Scavengers
I actually like this gang a lot. But they were in the comics for only a single issue before being gunned down in front of Alexandria. Gave Liam a denims and leather look. I know a lot of heavy metal listening roleplayers thinking themselves ready for the zombie apocalypse - they would get eaten right away.
Brian Blake and Reggie
Brian Blake before he became The Governor is from the Prelude to Woodbury set. Reggie is a nice character to make, a cool bad buy model (despite him dying on page 1, issue 1). 

Dale, Andrea and Amy
A lovely little trio of miniatures. Amy is the first pink I've ever painted.  

 Shane, Jim, Sophia and Carol
Painted Shane in the same uniform colours as Rick Grimes. The 'POLICE' on his cap was a pain to paint, but adds a lot to the model. Jims cap wasn't much better, I tried to make the 'CAT' logo that he has in the comics.
Allen and Donna
Husband and wife. Not seeing much action on the table, but it's a nice couple of miniatures.

Negan and Craig
Craig's not named in the comic, part of a small child molesting gang. They quickly died. I'm really pleased with the way his camo paints turned out. Negan is Negan - super cool and with a nice pose.  

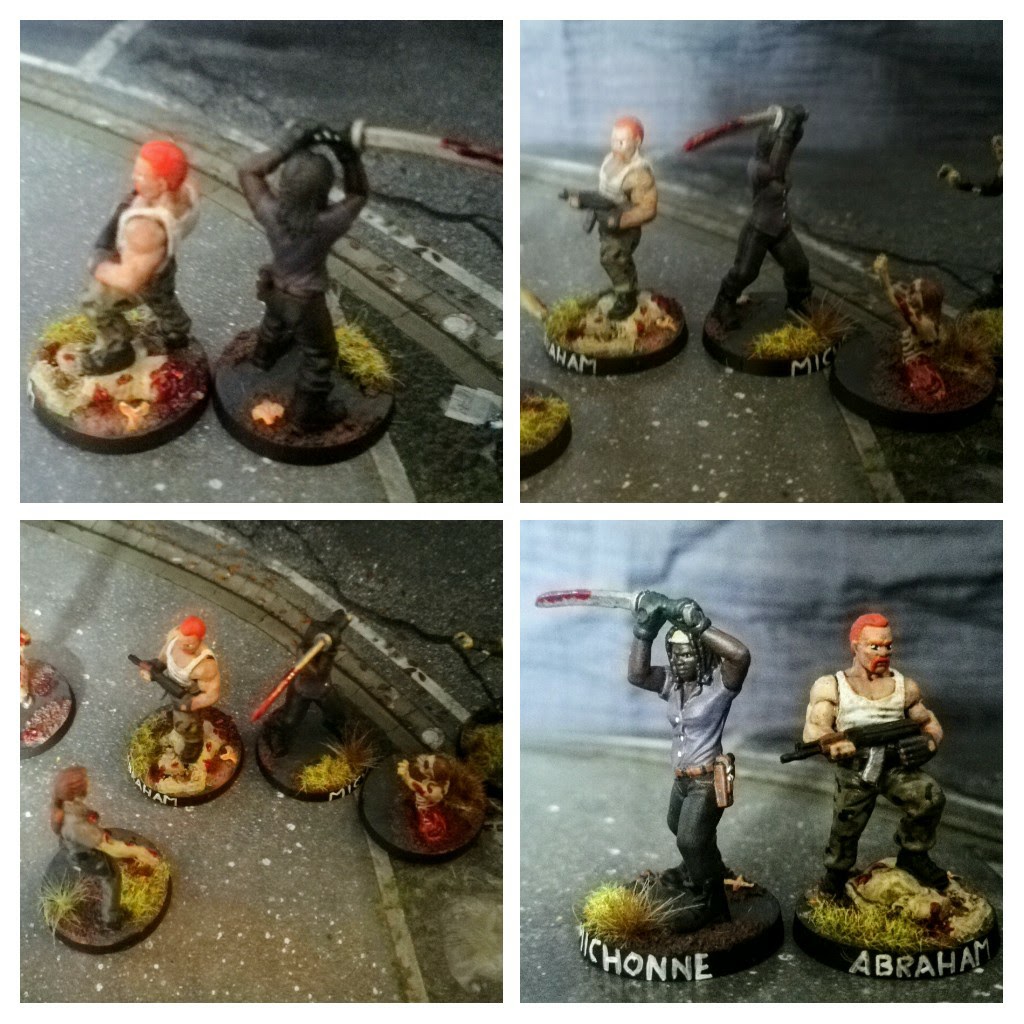
Abraham Ford and Michonne
Both the models are Kickstarter Exclussive sculpts. Never really gave much for that 'KSE' stamp, but it's some super cool models. Michonnes colour scheme is based on a colour cover of the comic. 

Rick on horse
This model was the absolute worst of all the models to paint. Don't really know why that was, just really didn't like painting it. But horses play a big part in the comics and I like the finished model. Perhaps it'll see use in some scenarios, not in regular games.

Morgan and Duane
A nice little father and son duo. The Duane sculpt I found was the worst of the wave 1 miniatures. Especially the head didn't have as clear details as the other miniatures in wave 1.


5 April 2017

Deadzone: Marauders WIP and more sci-fi bases

This month as part of 'Pledge, Paint or Pay!' I'm building my Marauders for Deadzone. A mix of old metal and restic miniatures.

I love the modern military look on these guys and a going for a brown/tan/desert camo look on them.

I got this team as part of the 'all strike teams starter' add-on. But Mantic was missing a few miniatures, so they put in extras of others. Going for a 'one of each' system for all strike teams I needed to do some converting.

It's been a while since I've converted and worked with greenstuff, as all my time has gone towards painting as much stuff as possible.

 Am always surprised at how much a basecoat does to a converted miniature.

Skyscraber
The skyscraber model came with options of doing a merc Leader or a regular Skyscraber trooper. Using a restic commando, a metal hammerfist dropsuit jump pack (forge father) and the scyscraber second metal head I made this (guy on the left).


Commando with combat shotgun (rifle)
I only got two different poses for the Commando Troops. But needing three troops, I wanted to make a third pose. Using the combat shotgun (rifle) from the skyscraber bits and cutting up a restic model I made this one.


Goblin reposed
The restic goblins come in two poses. One is a cool kneeling goblin, the other has a weird frightened jumping pose. Using some hot water, I tried to repose him looking running instead.


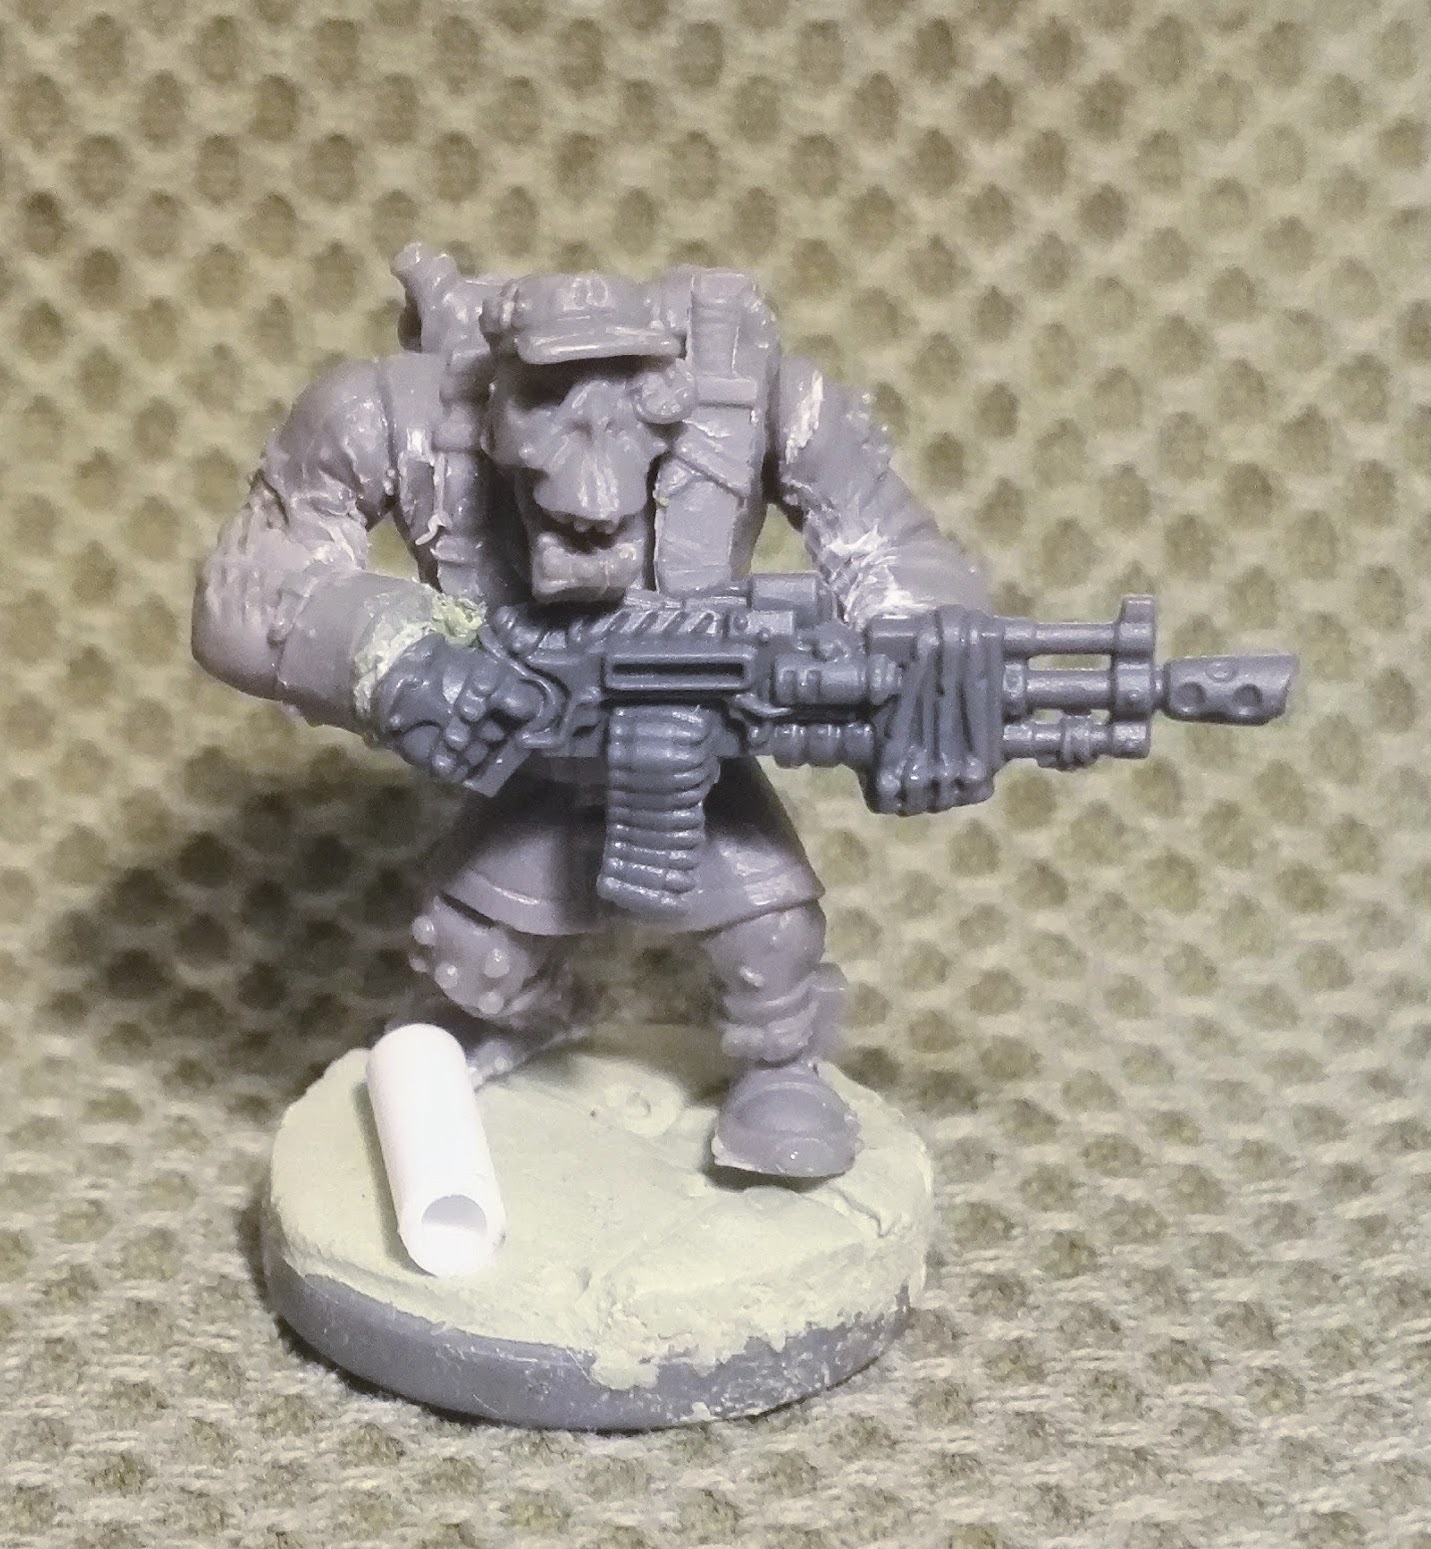
Commando with heavy machine gun
Commandos can have two different heavy weapon upgrades. Flamethrower and HMG. Converted this HMG Specialist by hot water bending the commandos arms and adding a Plague Stage 3a HMG bit. I also reposed the head, to make him look in the direction he's holding the gun.

More sci-fi bases 
And 2,5 hours of work, including breaks and clean up gave nme a new set of bases. This should pretty much see me through all m Ver-Myn that's getting build and painted in May. A tutorial on how I'm doing my bases can be seen here.


3 April 2017

Tutorial: Industrial Crane

I love Mantic Games Battlezone terrain. The tile system is brilliant, easy to build good looking stuff and it's fairly cheap.

Back when I started Deadzone, I ordered myself a single Sci-fi Urban District - and set the challenge to make the most of it! The entire trick to this build is sprue - best free hobby material in the world.

This crane is a favourite of mine and is seeing action in Deadzone, Necromunda and Scrappers.

Materials: 
  • Battlezone tiles
  • Old necklace
  • Miliput and play-doh
  • Plastic sprue
  • Adhessive sticker paper - printet with logos
  • Screws
  • Metal net
  • Tools: Hobbyknife, clipper
  • Glue: Plastic glue and super glue.

The Build

Step 1:
Made a single 3'' cube from battlezone tiles. Then cut out some long pieces of sprue, I went for 9'' pieces. When preparing sprue I go for pieces with as many injection dots on them as possible. It'll end up looking like bolt, screw etc later. Also cut your sprue uneven, by chipping away pieces of it.


Step 2: 
I always glue my battlezone stuff together. Think of a cool design and make it permanent with glue. I don't find the modular system with clips really work well enough.


Step 3:
Strengthen the build with cross beams of sprue. I also added a small battlezone half tile platform. It's important to add some high detail stuff to 'sprue builds', it'll make it look expensive.


Step 4:
The elevator platform is made from a (just short off) 3'' square with metal mesh. Metal mesh is a great material and you'll get a lof for cheap at the hardware store. I glued sprue to both sides of the net, use lots of super glue. Cut a hole in the middle of the net. 


Step 5:
For the roof of the crane I've used a hardplastic tile. Give it all some extra stability. Glue a bolt to the tile, this is for the elevator chain. Use lots of superglue again, this thing will carry some weight. Do the same with a bolt on the floor of the elevator.


Step 6:
When I visit a charity shop, second hand store or yardsale I always pick up old necklaces. It's cheaper than buying hobby chain for the craft store and it's great for so many builds.

It was a bit fiddly to get this to work. The elevator mesh plkatform is actually glued onto the side of the tower. When glueing the chain in place, you have to hold it, cover it in superglue, sacrifice you fingers and wait. The chain ain't loose in this build, it's made solid from a lot of super glue.


Step 7:
Build the arm of the crane. Same way as the tower itself. This is made from 6'' pieces of sprue. I've added some extra small pieces of sprue on the top, it'll make it much easier to balance models on the top.


Step 8: 
Use another chain to make the crane. Originally I would have used some plastic hooks that was in some of my wifes new clothes, build then I found an old 40k Defiler craw and chopped that into a crane hook. Also found some other bits for the wrench - I think they're from some tank. But you could easily use another bolt or screw for this part.


 Step 9:
I wanted a platform at the base of the crane, but didn't have enough half tiles from the battlezone set. I decided to make one myself. Took an old lid from a potato salas, as it's nicer to work with plastic. 


Step 10: 
Using a 50:50 mix of miliput and play-doh and using the Greenstuff World Factory Rolling Pin it's no problem adding details. The 50:50 mix makes it easier to use the pin and it lowers the price on putty a lot!


Step 11: 
Let the putty dry completly before doing the other side. Or skip this step - you won't look at the buttom that often. I also added a floor to the crane (made the same way). Add some support to the platform with some plastic sprue.


Step 12:
Glue the entire thing together. The connections in on the sprue tower will look a bit messy (unless you really take your time with precise cuts). It's hid them with small square of plastic sheet, it also adds some bulk to the build.


Step 13: 
Add extra details to the build and paint it up. I've gone for a messy yellow and grey paint scheme.This is where those injection mold points are coming to their right, it'll bring out the drybrushing and adds point for the wash to pool up.


I've printed a lot of warning labels and 'danger stribes' on adhessive sticker. It's easy to add some details a lot over your own painting skill this way.

I've used super glue lids (had a couple after the build) for chemical cannisters. Also added some bolts (with lots of nuts) on the button of the build. Add some heavy weight and easily paints up as cannisters.


All done!


1 April 2017

A few The Walking Dead games

A few games of The Walking Dead
Had a few very nice and bloody fights of The Walking Dead last night.

I decided as always to snap a few photos of the action, but also tried capturing some small videos to show the set up. It's a neat little trick, just need some practice in doing it right.

Game 1:
My mate Lau took Allen, Donna, Morgan and Duane up against my team of Andrea, Derek and Sandra. I won the first game with most loot counters as the threat reached 18. Not too many zombies entered play, the events were easy on us.

My first game running Andrea with a crossbow, a very nice combination. Still had here running out of ammo, and trying to find some from the loot. Duane had a lot of loot counters and then tried to end Sandras life with a showel to the head. It failed and Duane died from Andreas crossbow bolts.

Lau figured he should have hid Duane with all his loot behind the shipping container. 


Game 2: Forrest Camp scavange run. 

This game had Lau taking Shane, Carl (with a crossbow) and Lori. I took Morgan, Patrick and Michonne.

The scenario was that out groups had both found a camp in the woods. All the survivors there were dead and turned into walkers, now lurking within their old defenses.

A very brutal game! Burning walkers left and right as the scrambled through camp fires and set tents ablaze.

Michonne died from a molotov cocktail thrown by Shane. It set everything around her on fire and drew in even more walkers. She didn't stand a chance against 4 flaming walkers. They rolled 14 red dice - as they get 1 extra dice from flames.

The game almost ended in a draw as Morgan tricked some burning walkers to attacking Shane. But Carl, who had missed every shot in the game, then put a crossbow bolt right into Morgans head. .. The game ended with Carl and new step dad Shane leaving the board with a single loot counter.